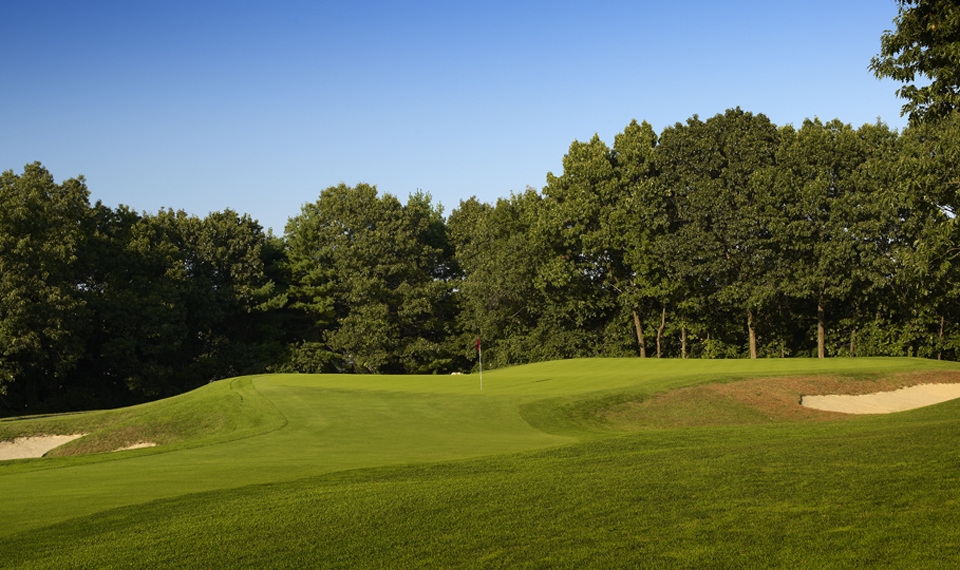
| A beautiful dogleg left that plays host to one of the most demanding tee shots -- error here spells trouble. Trees guard both sides of this narrow fairway. Playing the ball down the right side of the fairway will give you best approach angle to the green. Bunkers surround this double tier green, making it one of the most challenging holes on the course. Long on this green and a price is paid. In the 1994 50th Anniversary Pro Member golf tournament, Senior tour player, Dana Quigley, playing with the then Club President, hit his approach shot long over the green and was furious that his ball ended up out of bounds, costing him the tournament prize. Auspiciously, construction on a bunker began the next day. Today, that bunker is named the Quigley Bunker. |